In the Adobe CQ5 CMS projects that I worked on, the front-end developers worked closely with the user experience (UX) and visual design (UI) resources. Establishing the site structure and the available templates is extremely important for CQ5 projects. Changes to the site structure can lead to extensive re-work, particularly in cases where specific breadcrumbs are implemented or areas where the developer needs to extract information about parent or child pages to display on the current page. Moving pages around is not easy. Also, there is no way to change a page's template once the page has been set up. (I can understand why they do this as otherwise, things can get very messy in the JCR.)
For the reasons mentioned above, details of templates and site structure is necessary at an early stage. For the purpose of this discussion, let's assume that we are building a website (unimaginatively dubbed MySite) with a home page, a page that lists data organised by category, and the lowest-level page, which would display content about the list item (an article). we will have the following three types of template used throughout the website:
- Home Page
- List Page
- Article Page
Now that we know that we have the templates to build, we need to complete the following tasks:
- create the main JSP page for the project, which will inherit the accompanying Java classes to use in our later templates.
- create a base template that extends the foundation page and separates the HTML into multiple files and that will be extended by other templates
- create additional templates that extend the base template and create JSP files to overwrite any of the base template files.
Creating the Main Page JSP, Extending global.jsp
Since we will need to develop our own Java methods to complete specific actions used on the pages, we should extend the /libs/foundation/global.jsp file and include specific Java pageHelper classes that we have created.
If we have multiple websites managed through our CQ5 installation, it is important to break the various Java files down into a core file to be used by all websites and then site-specific Java files. This path to the project.jsp file is: [PATH]/apps/[PROJECT-NAME]/project.jsp
Each project will have its own project.jsp file, and this file's imports will reflect the project. The project.jsp file will contain the below mark-up to import the particular files, a core PageHelper and a MysitePageHelper. We will also be including the global.jsp file so we can use the other elements specified in the foundation global.jsp.
The Java classes (PageHelper) listed below would be placed in the directory: [JAVA-PATH]/src/main/java/com/[COMPANY-NAME]/
project.jsp
<%@page session="false" import="
static com.mycompany.cq.core.util.PageHelper.*,
static com.mycompany.mysite.util.MysitePageHelper.*
"%><%
%><%
%><%@page session="false"%><%@include file="/libs/foundation/global.jsp"%>
Now that we've set up this project.jsp file, we can move on to the next step, which is creating our base page template.
Creating the Base Page Template
Now, the page templates need to be set up. The path to the templates is located at: [PATH]/apps/[PROJECT-NAME]/templates
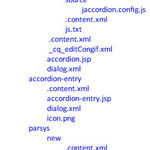
To create a new template, we simply create a new directory under the 'templates' directory mentioned above. The name of the directory will coincide with the name of the template, without spaces and illegal characters. Inside this directory we will place the file .content.xml. This file stores information about the template. We should also include a screenshot of the template, saved as thumbnail.png, so that the content editor can easily see the template that they wish to use when they create a new page.
The first template that we will create is a "base template". This template will allow us to set up the base structure, which will be inherited by other templates. I've named the directory "base-page". The .content.xml file contents is shown below:
<?xml version="1.0" encoding="UTF-8"?>
<jcr:root xmlns:sling="http://sling.apache.org/jcr/sling/1.0" xmlns:cq="http://www.day.com/jcr/cq/1.0" xmlns:jcr="http://www.jcp.org/jcr/1.0"
jcr:primaryType="cq:Template"
jcr:title="MySite Base Page"
allowedPaths="/content(/.*)?">
<jcr:content
cq:designPath="/etc/designs/mysite"
jcr:primaryType="cq:PageContent"
sling:resourceType="mysite/components/template-components/base-page"/>
</jcr:root>
Note that the jcr:resourceType in the file above points to the location where the JSP file is stored. The template files are displayed in the path: [PROJECT-NAME]/components/template-components.
Underneath this path, create a directory for each template to match the template name in the templates directory, as detailed above. This directory will also include the .content.xml and the relevant JSP files. The details of the .content.xml are below.
<?xml version="1.0" encoding="UTF-8"?>
<jcr:root xmlns:sling="http://sling.apache.org/jcr/sling/1.0" xmlns:cq="http://www.day.com/jcr/cq/1.0" xmlns:jcr="http://www.jcp.org/jcr/1.0"
jcr:description="Mysite Base Page Component"
jcr:primaryType="cq:Component"
jcr:title="Mysite base page component"
sling:resourceSuperType="foundation/components/page"
componentGroup=".hidden"/>
Note that the sling:resourceSuperType in the base template should point to the foundation's component 'page'.
After creating the directories with the relevant details, we now create the JSP pages, which need to be placed in the directory mentioned above: [PROJECT-NAME]/components/template-components/base-page
Separating the different parts of the HTML page is recommended here, and I recommend using the HTML5 Boilerplate as an example of your HTML file and break the HTML page down. You should break your main HTML template down into smaller files, such as header.jsp, headlibs.jsp (contains scripts loaded in the header), footer.jsp, body-tag.jsp, seo-footer.jsp (contains SEO-specific scripts), libs.jsp, and so on. I've created an example of what one file (footer.jsp) could look like below:
footer.jsp (example)
<%@include file="/apps/mysite/project.jsp"%><%
%><div id="footer">
<cq:include script="seo-footer.jsp" />
<p>Put static content here.</p>
<cq:include path="copyright" resourceType="foundation/components/parsys"/>
</div>
In addition to your specific JSP files, you will also need to include a file called init.jsp which is copied from one of the core files for CQ5, /lib/wcm/core/init/init.jsp. However, the only difference here is setting previewReload = true so that the page refreshes when the user switches from 'edit' mode to 'preview' mode. Naming this file the same as the original file overwrites it, so our file below will be used instead.
init.jsp
<%@include file="/libs/foundation/global.jsp" %><%
%><%@page import="com.day.cq.wcm.api.WCMMode" %><%
if (WCMMode.fromRequest(request) != WCMMode.DISABLED) {
String dlgPath = null;
if (editContext != null && editContext.getComponent() != null) {
dlgPath = editContext.getComponent().getDialogPath();
}
%><cq:includeClientLib categories="cq.wcm.edit" />
<script type="text/javascript">
CQ.WCM.launchSidekick("<%= currentPage.getPath() %>", {
propsDialog: "<%= dlgPath == null ? "" : dlgPath %>",
locked: <%= currentPage.isLocked() %>,
previewReload: "true"
});
</script>
<% } %>
The following file is the content.jsp file, which will be overwritten for each template. The template imports various CQ5 classes and sets the "cq" taglib variable to be used to access other elements, such as the components.
content.jsp
<%@include file="/apps/mysite/project.jsp"%>
<%@page import="com.day.cq.wcm.api.WCMMode, com.day.cq.wcm.foundation.ELEvaluator, com.day.cq.commons.Doctype"%>
<%@page session="false"%>
<%@taglib prefix="cq" uri="http://www.day.com/taglibs/cq/1.0" %>
<div id="content">
<cq:include path="main" resourceType="foundation/components/parsys"/>
</div>
Now that we have set up our base template, we need to set up our individual templates, all of which will extend this base template.
Set up the Home Page Template
Now that we've created the "base template", we will create the other templates in the same format. We will use the 'Home' template as an example.
.content.xml in [PATH]/apps/[PROJECT-NAME]/templates/home
<?xml version="1.0" encoding="UTF-8"?>
<jcr:root xmlns:sling="http://sling.apache.org/jcr/sling/1.0" xmlns:cq="http://www.day.com/jcr/cq/1.0" xmlns:jcr="http://www.jcp.org/jcr/1.0"
jcr:primaryType="cq:Template"
jcr:title="MySite Homepage"
allowedPaths="[/content/mysite(/.*)?]">
<jcr:content
cq:designPath="/etc/designs/mysite"
jcr:primaryType="cq:PageContent"
sling:resourceType="mysite/components/template-components/home"/>
</jcr:root>
Notes: Note that we set the allowedPath to this project (mysite) only if we are inheriting from a core project and have multiple projects set up under the environment. If you have multiple projects, you would set this to the site that you want to access this template.
.content.xml in [PROJECT-NAME]/components/template-components/home
<?xml version="1.0" encoding="UTF-8"?>
<jcr:root xmlns:sling="http://sling.apache.org/jcr/sling/1.0" xmlns:cq="http://www.day.com/jcr/cq/1.0" xmlns:jcr="http://www.jcp.org/jcr/1.0"
jcr:description="Mysite Homepage Component"
jcr:primaryType="cq:Component"
jcr:title="Mysite homepage component"
sling:resourceSuperType="mysite/components/template-components/base-page"
componentGroup=".hidden"/>
Notes: Note that we set the sling:resourceSuperType to the base-page that we created. All sub-templates should inherit the base template.
In the above folder (under template-components/home), we have two JSP files. You can have as many as you like, and if you wish to overwrite one of the JSP files from the base template, you can do so by creating a file with the same name in the directory. I have overwritten the body-tag.jsp for the home page. The reason that I have done this is because I want to add a different class on the 'body' tag for the home page so that we display some elements slightly differently on this page.
The contents of body-tag.jsp
<%@page session="false"%><%
%><%@include file="/apps/mysite/project.jsp"%><%
%><!--[if IE 7]> <body class="no-js ie7 home"> <![endif]-->
<!--[if IE 8]> <body class="no-js ie8 home"> <![endif]-->
<!--[if IE 9]> <body class="no-js ie9 home"> <![endif]-->
<!--[if gt IE 9]><!--> <body class="no-js gtie9 home"> <!--<![endif]-->
<script type="text/javascript">
//remove the no-js class from the body tag
var bodyTag = document.getElementsByTagName('body')[0];
bodyTag.className = bodyTag.className.replace('no-js ','');
</script>
Notes: The standard browser checks are in place and set against the body tags here. We use Javascript to remove the 'no-js' class if Javascript is enabled. The only difference with this template is that we append the extra class dubbed 'home' to pages that use this template so that we can style the home page template slightly differently. You may not need this for your site, but it's good practice to see this in action and to see how you can change your pages for slight design differences. For more information about detecting browsers, you may wish to have a look at HTML5 Boilerplate. You can adapt this to fit your own needs.
The contents of content.jsp
<%@include file="/apps/mysite/project.jsp"%><%
%>
<div id="content">
<cq:include path="main" resourceType="foundation/components/parsys"/>
<cq:include path="secondary" resourceType="foundation/components/parsys"/>
</div>
Notes: We set up two parsys components here for content editors to drag and drop their components into.
Set up the Additional Templates
Now that we have the Home template example, we can continue to set up our other templates using this as an example. The main difference is that we will probably not need to replace the body-tag.jsp. Instead, we will replace the content.jsp file with the basic page elements and components that we will place on the page automatically and other areas (parsys) where the content editor will insert custom components.
The contents of content.jsp
<%@include file="/apps/mysite/project.jsp"%><%
%>
<div class="left-col" id="content">
<cq:include path="header" resourceType="mysite/components/header"/>
<cq:include path="main" resourceType="foundation/components/parsys"/>
<div class="secondary">
<cq:include path="left-nav" resourceType="mysite/components/component1"/>
</div>
</div>
Have Fun
That's all you need to know in order to get started creating your CQ5 templates. The above framework should allow you to create extensive components for multiple projects from a core framework. Have fun creating these and let me know if you have any observations.


Actually you can change a pages template via the bulk editor.