January 2013 Archives

Fixed Navigation & Navigation Design

| No Comments | No TrackBacks
Website navigation is one of the most important areas of a website as it determines how the user can browse the website and the various areas on the website. Careful thought must be given into the navigation and the website's structure, the terminology, the location, and whether or not the navigation is fixed. Most importantly, the website must be easy to browse and the user must be able to determine where the information that they need is located. This brings us to the first topic: structure.


Structure

The website's architecture or structure should be planned out so that the information flows and similar content is grouped together or in a hierarchy. In a past project that I worked on (for a university), we had a top level structure based on our user personas or user types. These areas included 'current students', 'prospective students',  'alumni', and 'staff/faculty'. 

Getting the website's structure correct takes research and an understanding of the user personas. These areas are often linked and it also reflects the journey that each user will take to meet their goals. Following on, the navigation's terminology must be understandable to the user.


Terminology

Terminology is one of those tricky areas that can bring up much discussion (and conflict) between individuals in companies. I've spent more time discussing the terminology for some projects that is needed. It's just one of those areas that some management types seem to focus on and want to change. 

Overall, the user must be able to relate to the terminology of the website. Often, the more simple the term, the better for the user to understand. The terminology should not make the user think. According to Silfer on Smashing Magazine (1), there are two important points when determining the terminology:

1. The labels must relate to the navigation and help to explore it.
2. Are the meanings of the labels separated enough not to be confused with each other?

In addition to the above, all terms that do not help the navigation need to be removed. In a past project that I worked on, we had the top level navigation items, which included: "News", "Your Companies", and "Your Watchlists". The word "Your" was removed because it was not necessary and over-complicated the website.

Keep in mind that the website must be as usable as possible, and because of this, labels should be used and the user should not rely on icons. However, using icons with a label is fine and helps the association of the area with an icon. I have seen websites that rely on an icon or on the user rolling the mouse over an icon in order to see the description of the area, and this simply is not good practice.

Moving on, the location of the navigation is important, particularly today as more and more users are browsing using tablets.


Navigation Location

Navigation has been traditionally at the top or left-hand side of the website. Either of these options was popular in the 1990s. Developers often used the left-hand side of the website to contain the navigation. (Remember frames?) However, the trend for the past several years has been to favour horizontal navigation at the top of the website.

With mobile devices and tablets becoming more popular, left-hand vertical navigation is becoming popular again. Developers can also use media queries to make their websites respond differently in different devices based on the size of the screen that the website is being viewed on.

Another factor to consider when developing the navigation is the option to make the website fixed on one area of the website.


Fixed vs Non-Fixed Navigation

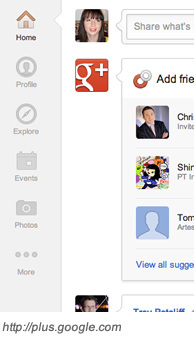
The recent trend seems to favour fixed navigation (on the side or top of the page). Many websites have started to adopt this technique. Fixing navigation is popular because it prevents the user from scrolling back up to the top in order to use the navigation to browse to another area.

A study was done by Denney (2) in 2012 in which he developed two identical websites with the navigation fixed in one and not fixed in the other. He found that the fixed menus were 22% quicker to navigate because the user was not forced to scroll back to the top of the page. He also noted that 100% of the users preferred the fixed-navigation website, but none of them knew why.

Some of the most popular websites are using fixed navigation. These include Facebook, Google+, Google, and Twitter.

Now that we've looked at the pros of fixed navigation, I'll explain the negatives. Firstly, fixing or not fixing the navigation must be considered for each website. In some cases, it simply may not be viable to include. Perhaps the navigation area is quite large and fixing the navigation means consistently losing the top 200 or more pixels of a page to the navigation. This makes the navigation an annoyance and distracting. Changing the navigation when the user scrolls is another option, but this again could create distraction and inconsistency. Only consider using fixed navigation if you believe that it can help the usability and experience of the website.

Secondly, do not forget tablet and mobile devices. These may require a different use case anyway as users tend to use mobile website versions for only core tasks. Identify these tasks. A different treatment of the website is required for mobile devices because the screens are much smaller. Consider the device that the user is using and determine the case for fixed or non-fixed navigation.


How to Fix the Navigation

Fixing the navigation is simple and done using CSS. To do this, you will want to use the 'position' attribute, and this should be set to the 'fixed' value. Developers may also need to set the 'z-index' attribute to prevent content from over-lapping the navigation.

#navigation {
   position:fixed;
}


Examples of Fixed Navigation

To wet your appetites, I've added a few examples of fixed navigation. Come back later to see more examples.

fixednav01.jpg

fixednav02.jpg
fixednav03.jpg
fixednav04.jpg


1) Silfer, Peter. Smashing Magazine. The Elements of Navigation. http://uxdesign.smashingmagazine.com/2012/03/20/the-elements-of-navigation/ [20 March, 2012].

2) Denney, Hyrum. Smashing Magazine. Sticky Menus Are Quicker to Navigate. http://uxdesign.smashingmagazine.com/2012/09/11/sticky-menus-are-quicker-to-navigate/ [11 September, 2012].

This Will be Available on Canvas Later...

| No Comments | No TrackBacks
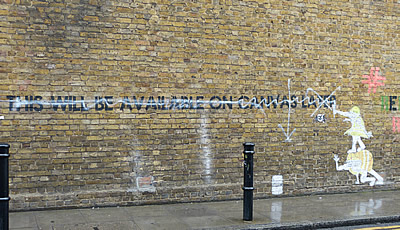
I discovered this street art on Hanbury Street near Brick Lane a little while ago. Unfortunately, the text has been crossed out, but it reads "This will be available on canvas later". Some additional street art has been added near it. I like this tribute to street art.

canvaslater.jpg

Days Out: Portmahomack, Scotland

| No Comments | No TrackBacks
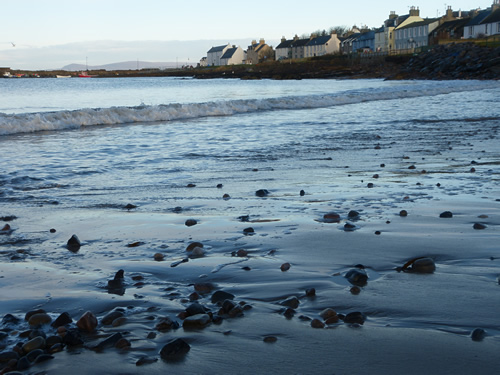
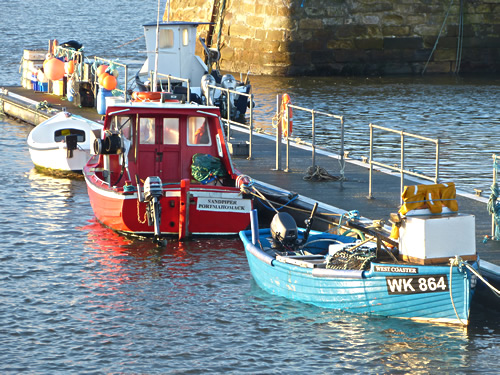
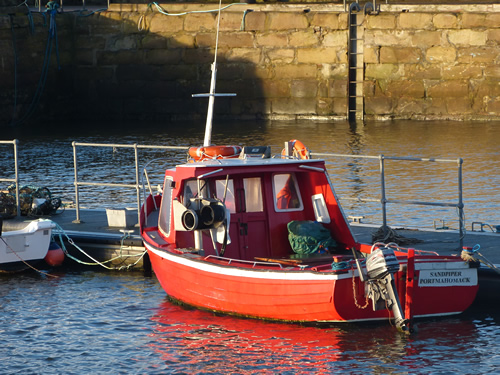
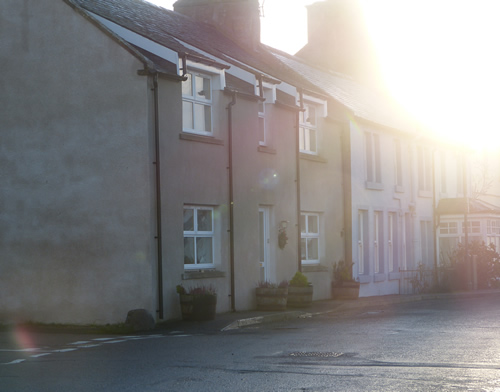
I spent the holidays in Scotland last year, and I took several photographs. One of the places I visited was Portmahomack, a quiet village on the coast. The following photographs are of the seaside in Portmahomack. High seas and storms at the end of 2012 have damaged the pier, and it caused several of the fishing boats to sink. Hopefully, they will get this fixed before even more damage is done. 

portm5.jpg
I found a lot of sea glass on this beach in Portmahomack, Scotland

portm1.jpg
Fishing boats in Portmahomack

portm2.jpg
Fishing boats in Portmahomack

portm3.jpg
Sea birds in on the rocks

portm4.jpg
Houses on the coast in Portmahomack, Scotland

I hope you have enjoyed these photographs.

Editing Column Widths in CQ5

| No Comments | No TrackBacks
Hopefully, you would have read the entry "Creating Web Templates in CQ5" before reading this article. In that article, I mentioned the importance of getting the site structure and visual designs correct beforehand, otherwise extensive rework may be needed.

  • This article explains how to set and edit column widths in Adobe CQ5 CMS for your websites. This article assumes that you can edit the CSS and decide which grid or column framework to use for your website, dependent on the designs.


Set up the CSS for the columns

Once the templates have been identified, the developer can identify column widths and set up a grid framework for the column widths, keeping in mind if the website will be a fluid one or a fixed-width one. The developer will need to identify the acceptable widths available for each template and create the CSS classes for the columns. The CSS will be included in the file, and I suggest splitting the CSS into multiple manageable files as this is good practice. For example, layout-specific CSS should be put in a layout.css. The CSS files will be concatenated and minified in the build process.


Set up columns for the templates

The page information and column information for a page can be found in the file:
[PATH]/etc/designs/[PROJECT-NAME]/content.xml

This file's contents are split by the template, and below is an excerpt of this file showing one template. In the example below, the name of the template is "level1". This file is updated when the columns are edited in the CMS.

Notes: 
  • The columns for this website (Mysite) are put into a group named Mysite.
  • Each section in the template is separated in this file. The following different sections, marking the parsys in the template, are described below:
    • main
    • secondary
  • For each parsys section, the "colctrl" is the column control area, and it defines the available layouts and the CSS style. For example, 3 Columns (25%, 25%, 50%)
3;grid-363 is the name of the column layout and the CSS class. (The column class is "grid-363", and the rest of the string above is the text that the content editor will see when they use the CMS to select a column.) The content editor will see the description for each column option to understand what column type to use in the parsys. 

<level1 jcr:primaryType="nt:unstructured">

            <main

                jcr:lastModified="{Date}2013-01-06T10:45:25.586Z"

                jcr:lastModifiedBy="admin"

                jcr:primaryType="nt:unstructured"

                sling:resourceType="foundation/components/parsys"

                components="[group:Columns,group:Mysite]">

                <section jcr:primaryType="nt:unstructured"/>

                <colctrl

                    jcr:lastModified="{Date}2013-01-06T10:39:03.337Z"

                    jcr:lastModifiedBy="admin"

                    jcr:primaryType="nt:unstructured"

                    sling:resourceType="foundation/components/parsys/colctrl"

                    layouts="3;grid-333&#x9;3 Columns&#xa;4;grid-44&#x9;2 Columns&#xa;4;grid-2222&#x9;4 Columns"/>

                <col_end13242935548710

                    jcr:primaryType="nt:unstructured"

                    sling:resourceType="foundation/components/parsys/colctrl"

                    controlType="end"/>

            </main>

            <secondary

                jcr:lastModified="{Date}2013-01-06T10:46:16.990Z"

                jcr:lastModifiedBy="admin"

                jcr:primaryType="nt:unstructured"

                sling:resourceType="foundation/components/parsys"

                components="[/libs/foundation/components/flash,group:Columns,group:Mysite]">

                <section jcr:primaryType="nt:unstructured"/>

                <colctrl

                    jcr:lastModified="{Date}2013-01-06T10:38:52.144Z"

                    jcr:lastModifiedBy="admin"

                    jcr:primaryType="nt:unstructured"

                     sling:resourceType="foundation/components/parsys/colctrl"

                    layouts="2;grid-66&#x9;2 Columns (50%,50%)&#xa;2;grid-93&#x9;2 Columns (75%, 15%)&#xa;2;grid-39&#x9;2 Columns (15%, 75%)&#xa;2;grid-48&#x9;2 Columns (40%, 60%)&#xa;2;grid-84&#x9;2 Columns (60%, 40%)&#xa;3;grid-633&#x9;3 Columns (50%, 25%, 25%)&#xa;3;grid-336&#x9;3 Columns (25%, 25%, 50%)&#xa;3;grid-363&#x9;3 Columns (25%, 50%, 25%)&#xa;3;grid-444&#x9;3 Columns (33%, 33%, 33%)&#xa;4;grid-3333&#x9;4 Columns (25%, 25%, 25%, 25%)"/>

                <col_end13243732957980

                    jcr:primaryType="nt:unstructured"

                     sling:resourceType="foundation/components/parsys/colctrl"

                    controlType="end"/>

            </secondary>

        </level1>


Have fun

Make sure that the file above is saved each time so that the content editor can select the column that they wish to use for the area. Enjoy!

Movie Posters of 2012

| No Comments | No TrackBacks
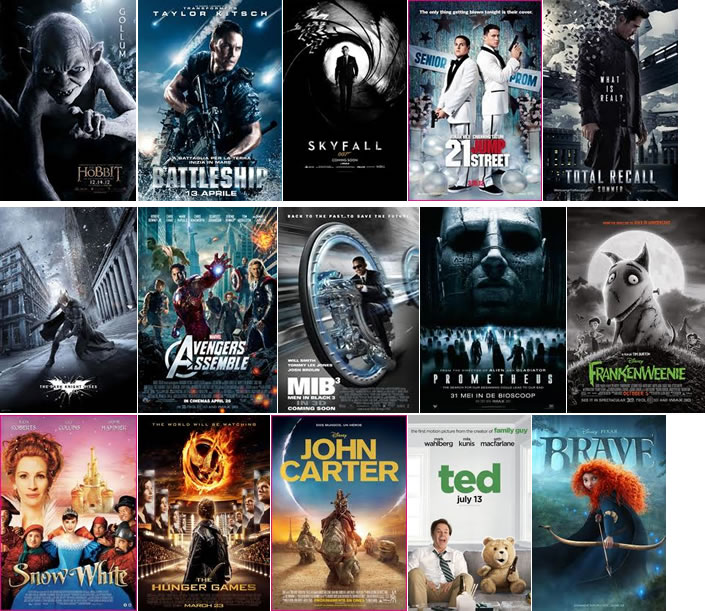
I've included a selection of posters of some of the films that came out in 2012. There seems to be a trend for many of the films released in 2012 to use muted blue and grey for their film posters. The muted blue or grey can then have a bright secondary colour, such is typically orange or red. However, the film "Frankenweenie" uses a lime green and orange with a grey-tone picture. "Brave", "Avengers", "John Carter", and "Hobbit" use orange in their muted-blue posters, and "21 Jump Street" use red as the secondary colour.

2012films.jpg

The exceptions seem to be "Snow White", "Hunger Games", and "Ted". "Snow White", which uses bright colours for its princess theme. Blue and pink are the most prominent colours in this poster. "The Hunger Games" is primarily orange. The poster for "Ted" uses neutral colours, and the title of the movie is green.

Edinburgh in Winter

| No Comments | No TrackBacks
I was looking forward to spending Christmas at home with my family, but my passport is still being processed. This also meant that I missed my brother's wedding as well as Christmas with my friends and family. The UK Home Office is taking a long while to process applications for Indefinite Leave to Remain. Mine has been with them since the beginning of September. The biometrics were done toward the end of November, so it is just a waiting game that has caused me much grief.

Being "trapped" in the UK and having to take Christmas week off, I found myself in Edinburgh for a day on my way up through Scotland. I've been to Edinburgh once before and also in the winter months. (The last visit was in November of 2005, so that is going back a few years now.) Unlike my trip that year, which was sunny but extremely cold, Edinburgh was being battered by hard rain. I did manage to glimpse the sun for a few minutes on the next day before it started to rain again.

Christmas markets and ice skating rinks seem to be popping up all over cities in the UK, and Edinburgh now has one. It is located near the Scott Monument and in Princes Street Gardens. There's a German market here as well as a traditional Christmas market, ice skating rink, reindeer, and various other Christmas attractions.

edinburgh01.jpg
Scott Monument's silhouette behind The Wheel of Edinburgh, decorated for Christmas

The next morning, the rain had ceased somewhat. I walked up to Edinburgh Castle to get some photographs. Seeing the castle early on a quiet and wet Sunday morning was an experience. I wanted to capture the expanse of the car park after the rain with the castle on the hill behind it with a few tourists walking about.

If the day is sunny and clear, I recommend the Camera Obscura. This is located next door, and through a pinhole of light and a mirror, you can see the image of what is happening outside being projected onto a table in a dark room.

edinburg02.jpg
Edinburgh Castle after the rain

The Royal Mile has many attractions along it. One of my favourite attractions is Mary King's Close. The Royal Mile used to be congested with people going about their daily busy and buying/selling items. The city was built up with buildings on top of buildings with small alleyways and closes leading off of the main street. One of these closes is Mary King's Close, and the attraction explains the history of Edinburgh and takes you to these built-up areas and discusses how the plague had impacted the history of the city. It's a fantastic attraction, and I recommend it.

edinburgh03.jpg
Buildings on the Royal Mile glow in the sunlight

Before heading out of Edinburgh, I stopped off at Greyfriar's Kirk. The kirk is noted for the tale of Bobby, the dog that never left his dead master's grave. Bobby is buried near his master's grave inside the churchyard. I didn't wander into the churchyard very far this time, but when I visited it in the middle of the day in 2005, I felt an eerie feeling. Apparently, I was not alone in this feeling as many others feel the same. The churchyard is one of the most haunted places in the world, if you believe in that. I was not ready to relive that experience on this occassion.

edinburgh04.jpg
The Hub from Greyfriar's Kirk

edinburgh05.jpg
The Hub from Candlemaker's Row

In addition to the above photographs, I have posted some below that I took in November of 2005. Below is a view of Edinburgh from the vicinity of the observatory area near Regent Gardens. There are pretty views of the city from here.

edinburgh07.jpg
A view of Edinburgh from Regent Gardens

I also visited the castle in 2005. There are excellent views from the castle hill.

edinburgh08.jpg
Edinburgh Castle

edinburgh11.jpg
View from Edinburgh Castle

I also visited Scott Monument and climbed to the top. I loved the gargoyles around this monument, and there are also good views from the monument.

edinburgh10.jpg
Scott Monument gargoyle and buildings in New Town

edinburgh09.jpg
Views of the Hub

Creating Web Templates in CQ5

| 1 Comment | No TrackBacks
In the Adobe CQ5 CMS projects that I worked on, the front-end developers worked closely with the user experience (UX) and visual design (UI) resources. Establishing the site structure and the available templates is extremely important for CQ5 projects. Changes to the site structure can lead to extensive re-work, particularly in cases where specific breadcrumbs are implemented or areas where the developer needs to extract information about parent or child pages to display on the current page. Moving pages around is not easy. Also, there is no way to change a page's template once the page has been set up. (I can understand why they do this as otherwise, things can get very messy in the JCR.) 

For the reasons mentioned above, details of templates and site structure is necessary at an early stage. For the purpose of this discussion, let's assume that we are building a website (unimaginatively dubbed MySite) with a home page, a page that lists data organised by category, and the lowest-level page, which would display content about the list item (an article). we will have the following three types of template used throughout the website:

  • Home Page
  • List Page
  • Article Page

Now that we know that we have the templates to build, we need to complete the following tasks:

  • create the main JSP page for the project, which will inherit the accompanying Java classes to use in our later templates.
  • create a base template that extends the foundation page and separates the HTML into multiple files and that will be extended by other templates
  • create additional templates that extend the base template and create JSP files to overwrite any of the base template files.

Creating the Main Page JSP, Extending global.jsp

Since we will need to develop our own Java methods to complete specific actions used on the pages, we should extend the /libs/foundation/global.jsp file and include specific Java pageHelper classes that we have created. 

If we have multiple websites managed through our CQ5 installation, it is important to break the various Java files down into a core file to be used by all websites and then site-specific Java files. This path to the project.jsp file is: [PATH]/apps/[PROJECT-NAME]/project.jsp

Each project will have its own project.jsp file, and this file's imports will reflect the project. The project.jsp file will contain the below mark-up to import the particular files, a core PageHelper and a MysitePageHelper. We will also be including the global.jsp file so we can use the other elements specified in the foundation global.jsp.

The Java classes (PageHelper) listed below would be placed in the directory: [JAVA-PATH]/src/main/java/com/[COMPANY-NAME]/

project.jsp

<%@page session="false" import="
        static com.mycompany.cq.core.util.PageHelper.*,
        static com.mycompany.mysite.util.MysitePageHelper.*
        "%><%
%><%
%><%@page session="false"%><%@include file="/libs/foundation/global.jsp"%>

Now that we've set up this project.jsp file, we can move on to the next step, which is creating our base page template. 


Creating the Base Page Template

Now, the page templates need to be set up. The path to the templates is located at: [PATH]/apps/[PROJECT-NAME]/templates

To create a new template, we simply create a new directory under the 'templates' directory mentioned above. The name of the directory will coincide with the name of the template, without spaces and illegal characters. Inside this directory we will place the file .content.xml. This file stores information about the template. We should also include a screenshot of the template, saved as thumbnail.png, so that the content editor can easily see the template that they wish to use when they create a new page.

The first template that we will create is a "base template". This template will allow us to set up the base structure, which will be inherited by other templates. I've named the directory "base-page". The .content.xml file contents is shown below:

<?xml version="1.0" encoding="UTF-8"?>

<jcr:root xmlns:sling="http://sling.apache.org/jcr/sling/1.0" xmlns:cq="http://www.day.com/jcr/cq/1.0" xmlns:jcr="http://www.jcp.org/jcr/1.0"

    jcr:primaryType="cq:Template"

    jcr:title="MySite Base Page"

    allowedPaths="/content(/.*)?">

    <jcr:content

        cq:designPath="/etc/designs/mysite"

        jcr:primaryType="cq:PageContent"

        sling:resourceType="mysite/components/template-components/base-page"/>

</jcr:root>


Note that the jcr:resourceType in the file above points to the location where the JSP file is stored. The template files are displayed in the path: [PROJECT-NAME]/components/template-components.

Underneath this path, create a directory for each template to match  the template name in the templates directory, as detailed above. This directory will also include the .content.xml and the relevant JSP files. The details of the .content.xml are below.

<?xml version="1.0" encoding="UTF-8"?>

<jcr:root xmlns:sling="http://sling.apache.org/jcr/sling/1.0" xmlns:cq="http://www.day.com/jcr/cq/1.0" xmlns:jcr="http://www.jcp.org/jcr/1.0"

    jcr:description="Mysite Base Page Component"

    jcr:primaryType="cq:Component"

    jcr:title="Mysite base page component"

    sling:resourceSuperType="foundation/components/page"

    componentGroup=".hidden"/>


Note that the sling:resourceSuperType in the base template should point to the foundation's component 'page'.

After creating the directories with the relevant details, we now create the JSP pages, which need to be placed in the directory mentioned above:  [PROJECT-NAME]/components/template-components/base-page

Separating the different parts of the HTML page is recommended here, and I recommend using the HTML5 Boilerplate as an example of your HTML file and break the HTML page down. You should break your main HTML template down into smaller files, such as header.jsp, headlibs.jsp (contains scripts loaded in the header), footer.jsp, body-tag.jsp, seo-footer.jsp (contains SEO-specific scripts), libs.jsp, and so on. I've created an example of what one file (footer.jsp) could look like below:

footer.jsp (example)

<%@include file="/apps/mysite/project.jsp"%><%
%><div id="footer">
     <cq:include script="seo-footer.jsp" />
     <p>Put static content here.</p>
     <cq:include path="copyright" resourceType="foundation/components/parsys"/>
</div>

In addition to your specific JSP files, you will also need to include a file called init.jsp which is copied from one of the core files for CQ5, /lib/wcm/core/init/init.jsp. However, the only difference here is setting previewReload = true so that the page refreshes when the user switches from 'edit' mode to 'preview' mode. Naming this file the same as the original file overwrites it, so our file below will be used instead.

init.jsp

<%@include file="/libs/foundation/global.jsp" %><%
%><%@page import="com.day.cq.wcm.api.WCMMode" %><%
if (WCMMode.fromRequest(request) != WCMMode.DISABLED) {
    String dlgPath = null;
    if (editContext != null && editContext.getComponent() != null) {
        dlgPath = editContext.getComponent().getDialogPath();
    }
    %><cq:includeClientLib categories="cq.wcm.edit" />
    <script type="text/javascript">
        CQ.WCM.launchSidekick("<%= currentPage.getPath() %>", {
            propsDialog: "<%= dlgPath == null ? "" : dlgPath %>",
            locked: <%= currentPage.isLocked() %>,
            previewReload: "true"
        });
    </script>
<% } %>

The following file is the content.jsp file, which will be overwritten for each template. The template imports various CQ5 classes and sets the "cq" taglib variable to be used to access other elements, such as the components.

content.jsp

<%@include file="/apps/mysite/project.jsp"%>
<%@page import="com.day.cq.wcm.api.WCMMode, com.day.cq.wcm.foundation.ELEvaluator, com.day.cq.commons.Doctype"%>
<%@page session="false"%>
<%@taglib prefix="cq" uri="http://www.day.com/taglibs/cq/1.0" %>
<div id="content">
    <cq:include path="main" resourceType="foundation/components/parsys"/>
</div>

Now that we have set up our base template, we need to set up our individual templates, all of which will extend this base template.


Set up the Home Page Template

Now that we've created the "base template", we will create the other templates in the same format. We will use the 'Home' template as an example. 

 .content.xml in [PATH]/apps/[PROJECT-NAME]/templates/home

<?xml version="1.0" encoding="UTF-8"?>

<jcr:root xmlns:sling="http://sling.apache.org/jcr/sling/1.0" xmlns:cq="http://www.day.com/jcr/cq/1.0" xmlns:jcr="http://www.jcp.org/jcr/1.0"

    jcr:primaryType="cq:Template"

    jcr:title="MySite Homepage"

    allowedPaths="[/content/mysite(/.*)?]">

    <jcr:content

        cq:designPath="/etc/designs/mysite"

        jcr:primaryType="cq:PageContent"

        sling:resourceType="mysite/components/template-components/home"/>

</jcr:root>


Notes: Note that we set the allowedPath to this project (mysite) only if we are inheriting from a core project and have multiple projects set up under the environment. If you have multiple projects, you would set this to the site that you want to access this template. 

.content.xml in [PROJECT-NAME]/components/template-components/home

<?xml version="1.0" encoding="UTF-8"?>

<jcr:root xmlns:sling="http://sling.apache.org/jcr/sling/1.0" xmlns:cq="http://www.day.com/jcr/cq/1.0" xmlns:jcr="http://www.jcp.org/jcr/1.0"

    jcr:description="Mysite Homepage Component"

    jcr:primaryType="cq:Component"

    jcr:title="Mysite homepage component"

    sling:resourceSuperType="mysite/components/template-components/base-page"

    componentGroup=".hidden"/>


Notes: Note that we set the sling:resourceSuperType to the base-page that we created. All sub-templates should inherit the base template.

In the above folder (under template-components/home), we have two JSP files. You can have as many as you like, and if you wish to overwrite one of the JSP files from the base template, you can do so by creating a file with the same name in the directory. I have overwritten the body-tag.jsp for the home page. The reason that I have done this is because I want to add a different class on the 'body' tag for the home page so that we display some elements slightly differently on this page.

The contents of body-tag.jsp

<%@page session="false"%><%
%><%@include file="/apps/mysite/project.jsp"%><%
%><!--[if IE 7]>    <body class="no-js ie7 home"> <![endif]-->
<!--[if IE 8]>    <body class="no-js ie8 home"> <![endif]-->
<!--[if IE 9]>    <body class="no-js ie9 home"> <![endif]-->
<!--[if gt IE 9]><!--> <body class="no-js gtie9 home"> <!--<![endif]-->

<script type="text/javascript">
//remove the no-js class from the body tag
var bodyTag = document.getElementsByTagName('body')[0];
bodyTag.className = bodyTag.className.replace('no-js ','');
</script>

Notes: The standard browser checks are in place and set against the body tags here. We use Javascript to remove the 'no-js' class if Javascript is enabled. The only difference with this template is that we append the extra class dubbed 'home' to pages that use this template so that we can style the home page template slightly differently. You may not need this for your site, but it's good practice to see this in action and to see how you can change your pages for slight design differences. For more information about detecting browsers, you may wish to have a look at HTML5 Boilerplate. You can adapt this to fit your own needs.

The contents of content.jsp

<%@include file="/apps/mysite/project.jsp"%><%
%>
<div id="content">
    <cq:include path="main" resourceType="foundation/components/parsys"/>
    <cq:include path="secondary" resourceType="foundation/components/parsys"/>
</div>

Notes: We set up two parsys components here for content editors to drag and drop their components into.


Set up the Additional Templates

Now that we have the Home template example, we can continue to set up our other templates using this as an example. The main difference is that we will probably not need to replace the body-tag.jsp. Instead, we will replace the content.jsp file with the basic page elements and components that we will place on the page automatically and other areas (parsys) where the content editor will insert custom components.

The contents of content.jsp

<%@include file="/apps/mysite/project.jsp"%><%
%>
<div class="left-col" id="content">
<cq:include path="header" resourceType="mysite/components/header"/>
<cq:include path="main" resourceType="foundation/components/parsys"/>
<div class="secondary">
           <cq:include path="left-nav" resourceType="mysite/components/component1"/>
    </div>
</div>


Have Fun

That's all you need to know in order to get started creating your CQ5 templates. The above framework should allow you to create extensive components for multiple projects from a core framework. Have fun creating these and let me know if you have any observations.

I'm Going to be a Contractor

| No Comments | No TrackBacks
While working at a past employer, I developed a few websites using the Adobe CQ5 content management system. This was self-taught and a new experience for all of us in the team, and we found quirks and established methods that led us to complete the projects. I've been wanting to make some notes on these areas for a while as I discovered my own methods and made more sense of the application. I hope to be working on CQ5 as well, as this was the plan before I accepted another position, so I thought that I'd dig up a few of my notes from the past and try to remember as much.

Overall, I enjoyed working with CQ5 as it allowed me to use some of my skills in Java as well as my skills in front-end development. I was diverted from this due to being head-hunted for a different position, which I accepted after much thought as I was considering contracting, but I felt that the company was wrong for me and the role I was sold never materialised. I took the risk, as I did have some reservations; I had a 50% chance of it working out and becoming the perfect role and perfect company. I did enjoy the role and provided a large amount of ground-work for the company to take what I've achieved to the next phase: research, user personas, user journeys, wireframes, visual designs, detailed features, site-maps, documentation, CSS, HTML templates based on the HTML5 Boilerplate, and responsive tablet/desktop framework. However, I feel that I am destined to do greater things.

I am really looking forward to "getting my hands dirty" again and working with other like-minded individuals who are passionate about technology, visual design, best standards/practices, and quality. I am really looking forward to using CQ5 again.

Over the next few days, I will be posting some information and tutorials related to CQ5 development. I've just formed my own company, so I intend to be contracting for a while. I feel that this is the right path for me, but we will see once I get a contract. Exciting times are ahead. (If you do need someone with my skills, please get in touch with me.)

I'm wondering if my visitors are contractors/freelancers or permanent staff? I'd like to know your thoughts. Do you have any advice? What do you enjoy the most? Do you miss being a permanent employee?

Tea at the Ritz, London

| 2 Comments | No TrackBacks
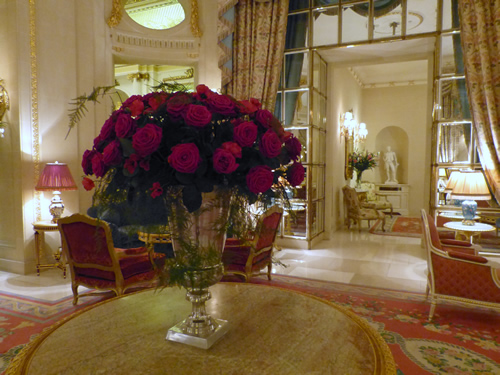
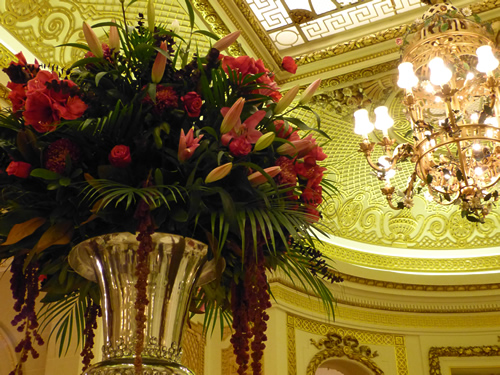
The bloke and I recently went to the Ritz hotel in London to enjoy afternoon tea. We soaked in the fantastic atmosphere at the Ritz in the tea room and lounge area and sipped our tea and champagne while listening to piano music. Before we were shown our seats, we explored the lounge area next to the tea rooms. Gold trim on the walls, beautiful large vases of flowers, mirrors, marble, and fine artistic detail in the architecture and furnishings made up the rooms.

ritz-01.jpg
Beautiful roses at the Ritz  

ritz-05.jpg
The flowers in the tea room, right beside where we were sat.

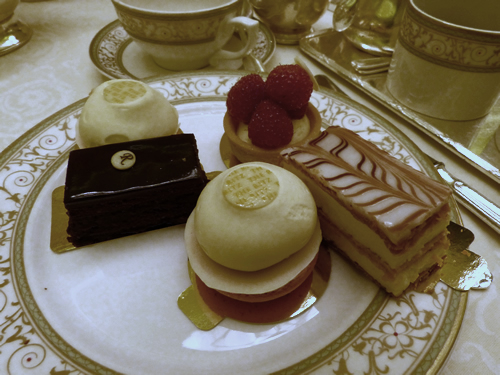
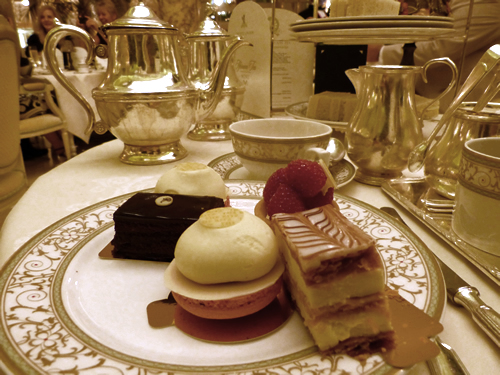
We were soon shown our seat and were brought our tea (we chose the Ritz special blend) in a silver kettle. The sandwich selection followed on a triple tier stand, and a selection of pastries were on the top. The sandwiches included chicken, cheese, salmon, ham, cucumber, and egg. The pastries included a slice of chocolate cake (delicious), creamy tart with macaroon bases, a raspberry tart, and a slice of a creamy and lemon-flavoured slide (with pastry).

ritz-02.jpg
A selection of pastries.

ritz-04.jpg
Pastries and tea.

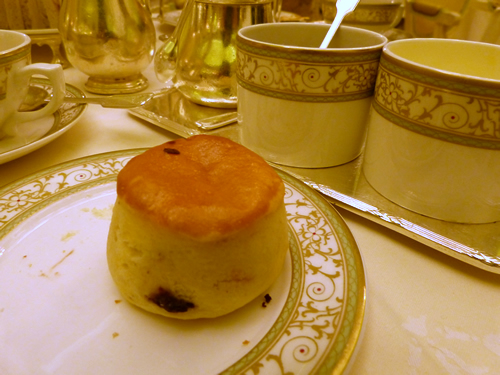
More sandwiches were brought out, and we could have had more pastries and scones if we had had more room in our stomachs! We got two scones each, but I was so full that I could not eat my last scone and had to leave it. The scones included clotted cream and strawberry jam.

ritz-03.jpg
A scone with tubs of clotted cream and strawberry jam.

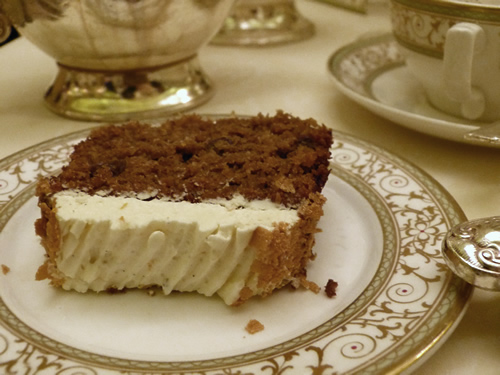
After the scones, we were offered a slice of cake. We had the choice between a lemon sponge or carrot cake. I selected the carrot cake, and the bloke had the lemon sponge. The cake looked delicious, but unfortunately, I did not find it to be moist enough, and it was quite bland. (The lemon sponge was also disappointing.)

ritz-07.jpg
A slice of carrot cake with cream icing.

After tea, we took a few more photographs before wandering back to the tube and on our way back home.

ritz-06.jpg
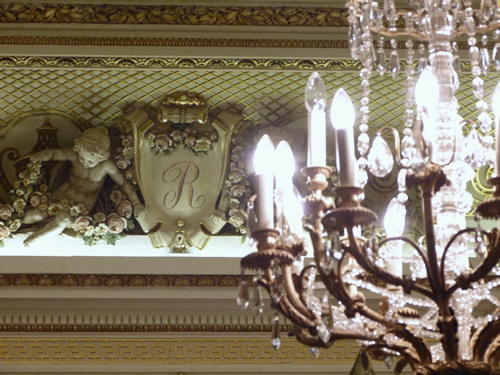
A chandelier in the tea room, with the Ritz logo in detail near the ceiling.

ritz-08.jpg
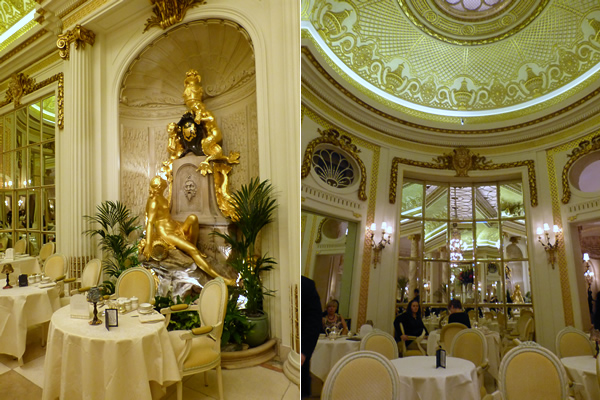
The tea room: a golden sculpture and the room set up with the tables with the fine detail on the walls and mirrors.

Rounded Corners (Border Radius) in CSS

| No Comments | No TrackBacks
Any web developer who has been in the industry for a number of years can tell you the pains of creating rounded corners on websites. In the past and before the days of CSS, we designed our page layouts in tables and nested tables. Each corner was saved as a graphic and placed inside a table data field. For rounded corners in tabs, this was painful and required a lot of extra mark-up and empty table data fields to create the tabbed effect. I, and probably many others, became an expert at creating image corners with the minimal number of pixels and colours at this time.

After browsers started to use CSS, developers still needed to save the corners as images. Instead of tables, we used DIVs to hold our corner images. We still needed to include extra mark-up for this, but it was better than using tables for design.

These days, many developers are using CSS3 to create borders without the need to save their rounded corners as images. Rounded corners can be achieved using CSS without the need for images in all browsers except for any version of Internet Explorer below IE9. Although you do find some websites supporting IE6, this is far less common now, and there are other websites that simply do not support IE7 (or provide the user with the chance to upgrade). Although this solution does not work in the IE8 browser (and older versions), many tend to feel a graceful degradation is acceptable.

The border radius is easily set in CSS. Developers will need to include three variations of this property so that the rounded corners are properly set in generic browsers, Mozilla, or Webkit. The user can use the following three lines to set the border. 

border-radius
-moz border-radius
-webkit border-radius

The above three lines can have one value, which will set the borders on all four sides, or it can take two values or four values. (This is similar to other CSS properties, such as padding and margin, where each side can have its own value.) If placing in two values, the values pertain to the top left and bottom right. If placing in four values, the values are in the following order: top-left, top-right, bottom-right, and bottom-left.

To target specific corners only, developers can use another property to target the specific corner. For example, if the developer wants to only change the top right corner, they can use the following:

border-top-right-radius
-moz-border-radius-topright
-webkit-border-top-right-radius

The same can be done for the other three corners. Yes, I agree that the consistency of the terminology between the different properties (Mozilla, Webkit, and CSS3) is a little confusing.

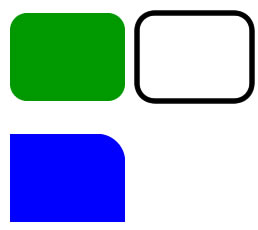
To achieve the borders below, I've provided a demonstration of how the properties should be used:
borders.jpg

Green box:

#green {
border-radius:10px;
-moz border-radius:10px;
-webkit border-radius:10px;
background-color:green;
}

Black and White box:

#black-white {
border-radius:10px;
-moz border-radius:10px;
-webkit border-radius:10px;
border:5px solid black;
}

Blue box:

#blue {
border-top-right-radius:10px;
-moz-border-radius-topright:10px;
-webkit-border-top-right-radius:10px;
background-color:blue;
}


Developers can experiment with the border radius property by visiting: http://border-radius.com/
On this website, developers can enter the radius of each corner and see the output produced. (Note that the CSS provided by this website is not efficient in certain instances as it sets each corner separately, but it's a good guide.)

In addition to changing the borders, the developer can also specify the border radius so that the 'box' appears elliptical. To do this, the developer will also use a slash (/) between the values. The first value is the horizontal radius, and the second value is the vertical radius.

borderradius.jpg

Green:

#green {
border-radius:40px 5px 40px;
background-color:green;
}

Yellow:

#yellow {
border-radius:50%;
background-yellow;
}

After reading this, you can get started creating rounded elements. Just remember that CSS3 will only work in certain browsers, and some older browsers do not support them.

Street Art Near Brick Lane

| No Comments | No TrackBacks

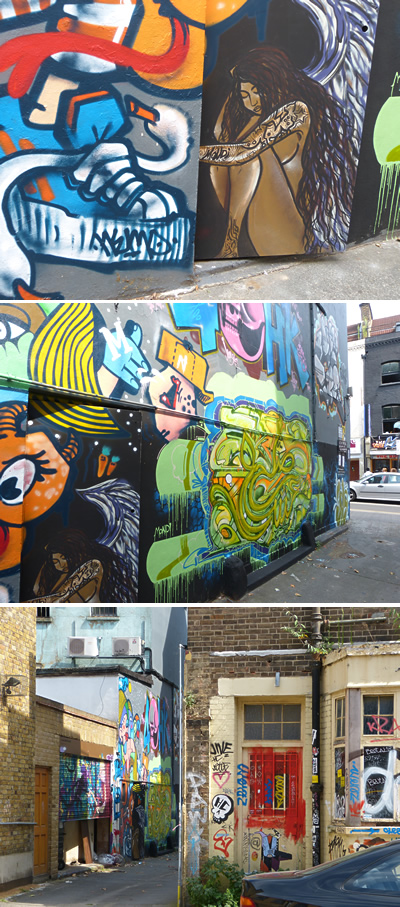
�I enjoy seeing the street art around Brick Lane whenever I visit. Every time I visit Brick Lane and Shoreditch, there is always something new to see. In fact, in one of the photographs of the street art below  of the shop door (the black and white one), I watched the artist painting the image on a trip to Brick Lane during my lunch hour when I worked in London. 

I am actually not sure which street artists were responsible for some of the artwork below to credit them. Let me know if you are aware of the artist so that I can credit their work.
streetart-brick01.jpg
From top:
1. 'Carrots with fangs' street art is located near Brick Lane - Nemo. 2. A shop door painting on Brick Lane. 3. A large-scale abstract image. 4. A man that resembles Hitler by Jade 11.
Just a side-note here, but the carrots with fangs remind me of one of my favourite book series as a child, Bunnicula (by James Howe). The Celery Stalks at Midnight was one of the books in the series, and the vampire carrots and other vegetables made me think of these books.
Moving on...
bricklane03.jpg
Various collages from the same alleyway and inner courtyard off of Brick Lane. I particularly liked the girl with the tattoos sitting on her own in a 'shadow' beneath the more colourful pieces.
bricklane02.jpg
bricklane04.jpg
From top:
1. Balloon-shaped crown for the Queen's Diamond Jubilee by Fan (Horror Crew). 2. A balloon dog by Fan (Horror Crew) and a lady with flowing hair (Vdeng). 3. Street artist Jimmy C. painted this skull using dots of colour, inspired by Damien Hirst's jewel skull. Unfortunately, it has been damaged. 4. A robin, artist unknown. 5. A collage of photographs 6. A portrait of a lady by Horror Crew, which is sadly damaged.
bricklane01.jpg
Street art advertisement for a blog.

Christmas at Ascot

| No Comments | No TrackBacks
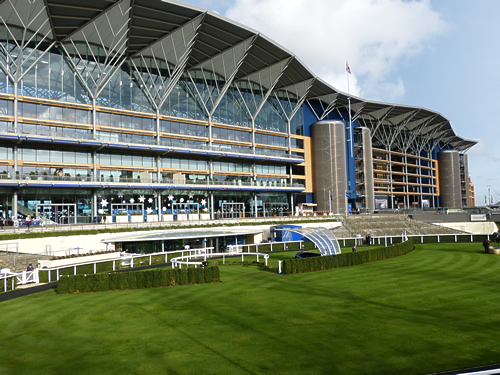
For the Christmas work party, my colleagues and I went to Ascot to watch the horse races and explore the Christmas market. There were several horse races throughout the day, and the race track was decorated for the holidays with various stalls selling crafts, jewellery, clothing, accessories, and other items. We received some free drinks and watched the races, and this was followed by a meal on the High Street (Ascot).

ascotxmas1.jpg
Ascot race course

ascotxmas2.jpg
One of the horses races on the track

ascotxmas3.jpg
The horses close in on the finish line
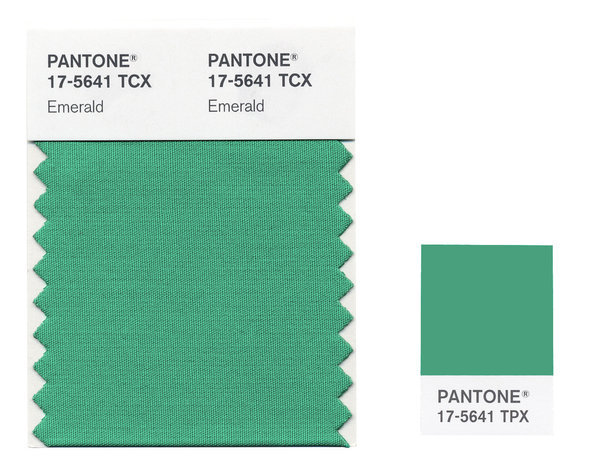
The company specialising in colour, Pantone®, has launched its "colour of the year" for 2013, and that colour is 'Emerald' (PANTONE 17-5641). I was happy to see this news after the past couple of years; green (emerald) is my favourite colour. At the beginning of 2012, the year's colour (deep orange - a.k.a. 'Tangerine Tango') was seen in fashion. I am hoping to see my favourite colour in a lot of products now.

pantone-2013.jpg

According to the Pantone® website, emerald is: "lively. radiant. lush...a color of elegance and beauty that enhances our sense of well-being, balance, and harmony".

For more information about the colour emerald or to see information about the Pantone "Colour of the Year", visit: http://www.pantone.com/pages/index.aspx?pg=21055&from=hp

Archives

Recent Comments

  • jenn: Thank you. read more
  • Murge: Amazing post. read more
  • Herbert: good post. site read more
  • Frank Quake: Hey, This is great when you said that I had read more
  • Chappy: You mention peptides here? I have had first hand experience read more
  • jenn: Thanks! I love the work. I have got more recent read more
  • Fanakapan: Thanks for the write up. This was some of my read more
  • jenn: Yes.... but that's only for the islands. Mostar and Montenegro read more
  • jenn: Hello, the code is not mine to hand out. I'll read more
  • pantich: More info about the best day trips from Dubrovnik can read more
OpenID accepted here Learn more about OpenID